Handmade ornaments, stockings or gifts have an eternal charm about them. Even today while rummaging through the drawers, when I suddenly chance upon a mitten carefully knit by my grandmom, it stirs within a wave of emotions and memories of childhood. Handmade stockings have an equally emotive quality. Though stockings are available in the market but some families like to adhere to the spirit of a traditional Christmas. It is based on an individual's choice for sure but for those who are looking for some tips on how to make Christmas stockings, I decided to put in a few inputs myself:
STEP 1: Use an old or inexpensive purchased Christmas stocking to make your own stocking pattern. Lay the stocking on a piece of brown paper and trace around the stocking with a pen or pencil, a 1/2 inch from the stocking edges. This will give you a 1/2-inch seam allowance.
STEP 2: Choose 1 yard of fabric for each Christmas stocking to be made and 1/4 yard of fabric for each cuff. Use a holiday print, quilted holiday fabric, or solid-color fabric or felt for your stocking. Make sure you have a coordinating thread color on hand.
STEP 3: Lay the stocking fabric on a flat work surface and fold it in half, lengthwise, right sides together. Pin your paper pattern to the fabric and use dressmaker shears to cut through the paper pattern and fabric along your marked line. Make sure you cut through both layers of fabric. Set these two pieces aside.
STEP 4: Place the stocking cuff fabric on your work surface. Use a fabric cutting board, a yardstick or ruler, and a fabric-marking pen to measure out two pieces of fabric that each measure 14 inches long. Use the top measurement of your stocking pattern for the width.
STEP 5: Fold each cuff piece in half, wrong sides together, so that you now have two pieces that are 7 inches in length and the top width of your stocking pattern.
STEP 6: Pin each folded cuff piece to the wrong side of a stocking piece so that all raw edges meet. Place pins at 1/2-inch intervals.
STEP 7: Use a sewing machine to stitch the cuff pieces to the stocking pieces. Sew 1/2 inch from the raw edges. Press the seams open with an iron.
STEP 8: Pin the two sewn stocking pieces together. Make sure that all edges match up evenly and that the right sides of the stocking pieces are facing each other. The pins should be perpendicular to the fabric edges.
STEP 9: Insert a folded length of ribbon or cording between stocking layers at the upper left cuff seam (to hang the stocking). The toe of the stocking should be pointing to your right. The ribbon or cording should be angled upward and inserted far enough between the layers to be caught in the 1/2-inch seam allowance.
STEP 10: Stitch along the edges of your stocking, 1/2 inch from the raw fabric edges. Remove the pins as you sew.
STEP 11: Turn the stocking right-side out and fold the cuff down so that the seam line is hidden inside the stocking.
For more check out:
http://msms.essortment.com/makechristmass_rebw.htm
http://www.ehow.com/how_9280_make-stocking.html
http://www.christmascarnivals.com/christmas-stocking/
Patterns:
- Christmas stockings coming in rich velour needs to be properly handled. Follow the pattern steps to bring out beautiful designs on the stockings. Suppose if you are planning to knit the figure of Santa Claus on the stocking, use bright cotton threads to carry on the sewing process. Beads, sequins and metallic threads can also be used. Santa Claus dressed in red and white attire reflects the traditional spirit of Santa. A blue cap on his head with works of beads should be finely dealt with to reach the perfect level. The background of the stocking should properly match with the color of the threads used to knit the entire body of Santa.
- You can depict the picture of your pet dog on the stockings. Along with the dog knit the figure of a dog bone that your pet might be delighted to see. The color should go with the background of the stocking. Colorful silk ribbons may be applied as dog collar.
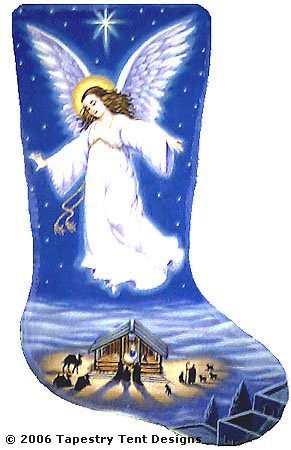
- The ideal traditional patterns are small fir and pine trees, the bear, toy trains, reindeer, snowmen, the gingerbread man, rocking horse, sleigh and bells.
- The spirit of freedom is reflected in a knitting pattern of a deer running into the night sky over the chimney, or with the design of a snowman with a scarf around his neck and a miniature broom in his hand.
- Is music your passion or sailing through the waves your hobby, let it be patterned in your Christmas stockings. The black and white keys of the piano and the notes of a piece can feature as patterns. The sailing boats or the riding horses will also be quite attractive designs.
- Personalize the Christmas stocking with your name.
- Make an elegant Christmas stocking by using cotton velveteen for your stocking fabric and a quilted satin fabric for your cuff.
- Add any trim or embroidery to the cuff and body of the stocking before you sew the stocking edges.
- A man's stocking could be made in the shape of a work boot or sewn from plaid flannel with a pocket on the front. Use an old shirt.
- A gardener's stocking could be made from burlap.
- An executive's stocking could be made from striped shirting with a tie in front.
Materials: Thick brown paper (like grocery bag paper) or brown felt
Pencil, Scissors, Glue, A holepunch, Yarn, Markers or crayons
If you don’t want to spend much on fabrics, paper can also be a good medium for attractive stockings. With the most common things readily available at home, like thick brown paper, glue, yarn of any color and scissors, you can create magic. Make an outline of any stocking on a brown paper, and cut out two pieces of the same shape. Then join the two with glue, and pierce holes on the edges. You may weave ribbons or yarn through these holes, which may appear as laces. Ultimately, decorate it with poster colors by making patterns.

Materials:
Cut 1 paw shape from each piece of the light tan fur and 1 from each piece of the dark tan fur. Cut paw pads from the brown felt. Pin the paw pads to the furry side of a dark tan paw and use the floss to whipstitch the pads in place. Pin together the 4 paws with the dark tan paws on the outside, furry sides out, and the light tan paws on the inside, furry sides in. Using the floss, whipstitch around the edges, sewing the paws together. Leave the top edges unsewn. At the top, sew together the front 2 edges, then the back 2. Fold down the top to make a cuff. Tape the ends of the cord to keep them from fraying, then sew the cord to the stocking for hanging.